|
See
Specifications
2-WEIGHT AND BALANCE
Be sure the unit is located where its weight will not adversely affect aircraft center of
gravity. You must do a weight and balance check before flying.
3-SECURE MOUNT
Be sure unit is mounted securely enough that it will not become loose on hard landings or
while taxiing on rough terrain. The unit may remain on your aircraft a long time. Consider
the abuse it will see.
4-ESCAPE "DOOR"
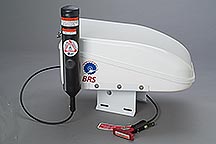
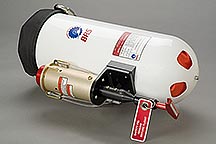
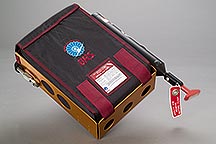
Be sure rocket has a means of escaping an enclosure. Dope and 2.8 ounce fabric coverings
are easily penetrated. Dacron sailcloth is much stronger. A velcro-closed panel will
suffice for Dacron and one is easy to add. Plastic (for windows or
turtledecks), fiberglass, or aluminum will require a BRS blow-through panel. Don't use up the rocket's
energy merely penetrating. Help it get out.
5-CLEAR PATH OF DEPARTURE
Be sure the rocket has a clear path of departure. You may not know what broken parts could
end up in the way (although it pays to think about this, too). However, be absolutely sure
you don't have the rocket aimed at something, like support wires, tail surfaces, internal
structural components, or other obstructions. Remember, the rocket leaves at a very high
rate of acceleration (100 mph in the first tenth of a second!!)-make sure it can get away
without interference.
6-AIRFRAME CONNECTION (#1 of 3)
Find a strong place or places to connect the airframe bridles. Airframes are strong
"as a system," but parachutes induce "point" loads that airframes
weren't made to accept. If one point can't handle 3-10 Gs of load, then you must use multiple connections. BRS
engineers use 1, 2, 3, 4, or even 5 if necessary. Also consider how the airframe will be
supported by the bridle(s). It is best to descend in a flight-level attitude.
7-CONNECT TO AIRFRAME TO ASSURE PITCH-UP (#2 of 3) Be sure your choice of
airframe connections includes one or more point(s) that is above and in front of the
aircraft's center of gravity. Assuring this means the nose will pitch up sharply on
deployment (to about 70°ree;). This greatly reduces opening loads to both parachute
and airframe.
8-BRIDLE ROUTING (#3 of 3)
Be sure bridle is routed efficiently, securely and esthetically. Bridles can be routed
under dope and fabric covering, but must be outside of structure and free of control linkages.
Bridle routing should begin where parachute exits and route to the connect point. Turns
are fine, but be sure any loose bridles are secured at intervals. Nylon tie wraps at 2 to
3 feet intervals are advisable, holding well but not too well (they'll break free on
deployment).
9-ACTIVATING HOUSING ROUTING
Be sure housing is routed free of engine and flight control interference and is well
secured along its path.
10-HANDLE PLACEMENT
Be sure all occupants can find, reach, and pull the handle. A neatly installed handle you
can't reach when an emergency happens is useless.
Click here more BRS
information!
|
