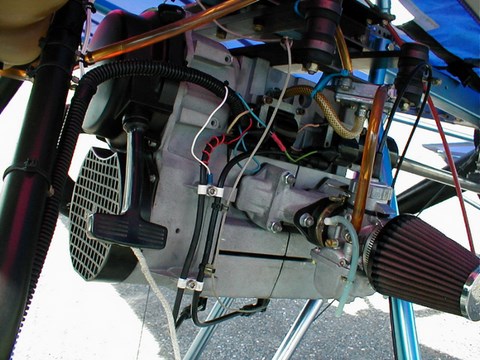
Quicksilver MX ultralight aircraft engine and fuel system troubleshooting
We will be discussing some of the problems associated with the engines used on the MX, but it is suggested that you read Problem solving the 430 Cayuna R, and Troubleshooting the Rotax family of ultralight engines, for a full report on the problems encountered in the use of these engines on various ultralights.
Whether using the Cayuna or Rotax engine use Premium unleaded fuel, with a good grade of oil.
When purchasing your gas buy it from a busy station, mix 5 gallons at a time, or whatever you will be using, and under no circumstances store premixed fuel in a bulk container, as it quickly looses its octane rating.
Make sure that the spark plugs you are using are the kind recommended by the manufacturer, and that they are properly gapped, prior to installation. Automotive spark plugs should NOT be used in aircraft application - use spark plugs designed for snowmobiles and ATV's. The starting gap used in automotive spark plugs starts out considerably larger than that of a snowmobile or ATV spark plug.
Plugs should be inspected periodically replaced about every 25 hours, or at the first sign of a miss), as should the fuel filter.
The air filter supplied by the manufacturer was a sponge filter which is very prone to water absorption, and is not a filter that I personally recommend. A K & N airfilter model RU 0600 has proven to work very effectively, and does not suffer from the water draw back.
A word of caution to owners who have installed weight shift Quicksilver engines, into an MX frame. The fuel supply system on most of the weight shifts were a GRAVITY FEED SYSTEM, the MX uses a fuel pump, the carburetor needle and seat are DIFFERENT.
Also any owner who for one reason on another replaces his carburetor should make sure that the carburetor is set up for a fuel pump. The needle and seat are different in carbs that use a fuel pump.
Cuyuna Rubber Intake Socket Can Cause Engine Failure
Pilots flying Cayuna powered MXs have reported erratic engine performance, engine overheating and engine seizures, and or lack of performance both on the ground and in flight. Upon closer inspection it was found that the rubber flange connecting the carburetor to the intake manifold had partially separated, UNDERNEATH the worm drive clamp used to hold the carburetor to the intake manifold.
The separation was not evident unless the pilot removed the carburetor completely, and inspected the flange closely. In some cases pilots took several months to locate the source of the problem.
The solution to the problem is to replace the carburetor mounting flange with a new flange, and if at all possible support the back of the carburetor so that the flange is not taking the complete weight of the carburetor and breather.
Another commonly reported problem was improper ventilation of the gas tank. In early model MXs the gas cap had a screw in vent on its top that was used to vent the tank. If this vent was inadvertently left closed the engine would run for a short while and them simply quit.
Later models eliminated the screw in vent, replacing it with a small hole. This hole has been reported to become plugged, and should be an area of periodic inspection. Another reported problem is in the deterioration of the cork liner in the cap. Apparently with time the cork liner rots and falls into the tank, where it has the potential to clog gas lines, filters, or fuel pumps.
Older style Quicksilver motor mounts failed
Several pilots flying Cayuna powered MXs with the motor mount arms shown in this picture have reported the arms breaking where the bolts go through to retain it to the motor, and or root tube bracket.
If you are flying on this style of mount it should be an area of regular preflight, and or update to the mount used on the Rotax powered MXs which to date have not been
reported to have this problem.
Quicksilver MX gas tank grommet failure
Several MX pilots have reported loss of fuel, both on the ground and in air. Upon closer inspection it was found that the rubber grommets used to seal the gas tank where
fittings are placed to supply fuel, had rotted and then cracked allowing fuel to escape. In other cases the sharp edges of the plastic tank had actually cut into the grommets
again resulting in leakage.
The solution to this problem is to:
1. round the inside corners of the holes that the grommets fit in.
2. replace the grommets yearly, or at the first sign of deterioration or leakage.


